 Vista
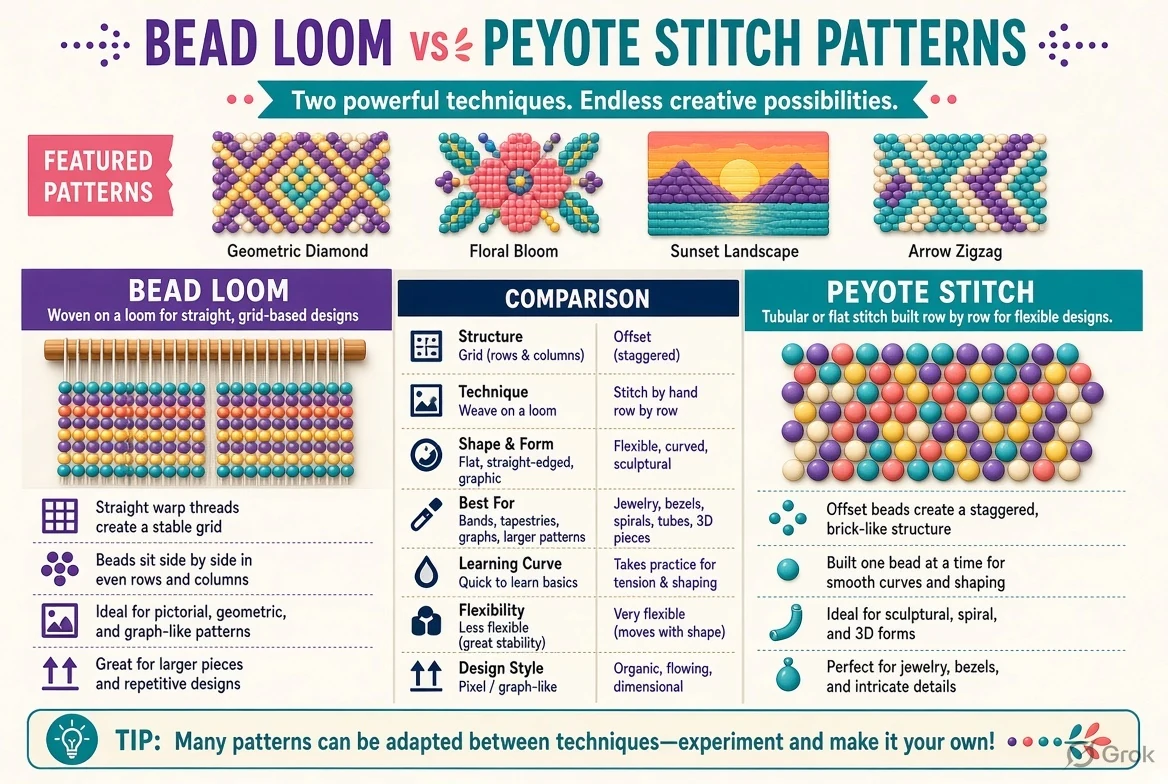
Direct answer: Bead loom weaving and peyote stitch can both produce colorful seed-bead bracelets, but their grids and thread paths are not interchangeable. A bead loom holds warp threads while the working weft positions beads in straight aligned rows. Peyote is normally woven off-loom: beads nest into alternating gaps, giving a staggered brick-like surface. Even-count and odd-count flat peyote also differ in how the working thread turns at row ends. Four illustrations here clarify the grid geometry, help you choose a bracelet pattern and show why you should not copy a loom chart directly into a peyote design without converting its layout.
Updated 20 November 2026. Illustrations are instructional references, not verified universal stitch patterns.
Bead loom versus Peyote: quick comparison
| Loom weaving | Uses warp threads held under tension on a loom |
|---|---|
| Peyote stitch | Off-loom woven rows of staggered seed beads |
| Even-count peyote | Even number of beads across; simpler turn |
| Odd-count peyote | Odd-width design; return turn needs more planning |
| Chart difference | Aligned loom graph versus offset peyote graph |
| Images | Loom grid, even, odd and comparison diagrams |
Four loom and peyote stitch charts
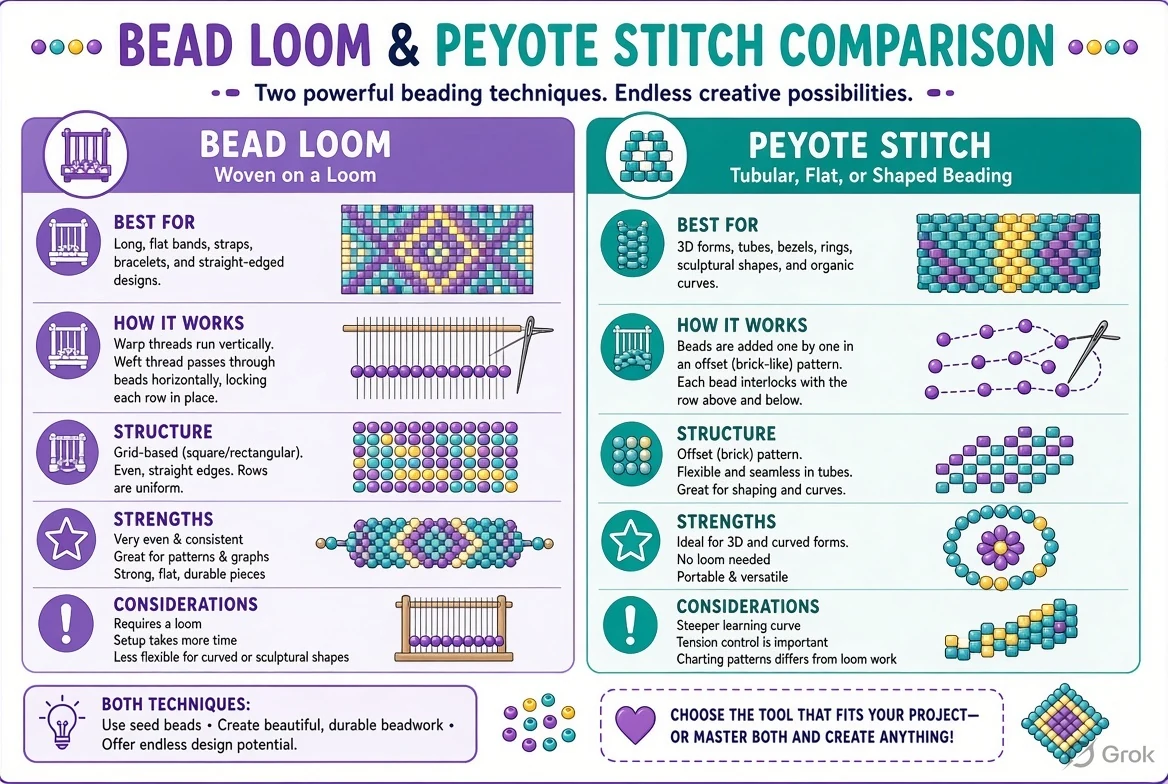
Bead loom versus peyote stitch: the central difference
A bead loom uses a physical frame and multiple lengthwise warp threads to support a grid of beads. The beadworker picks up the beads for one row on a needle, positions them below the warp threads and then passes the needle back through the beads above the warp to lock them. Peyote stitch instead forms a flexible bead fabric off the loom: each bead sits in a gap among neighbors and the thread travels through preceding beads according to a specific repeating path. Both can make impressive colorful bracelets, but the arrangement of beads, finishing work and design charts differ. Select the method before selecting a pattern file.
What does a bead loom pattern grid look like?
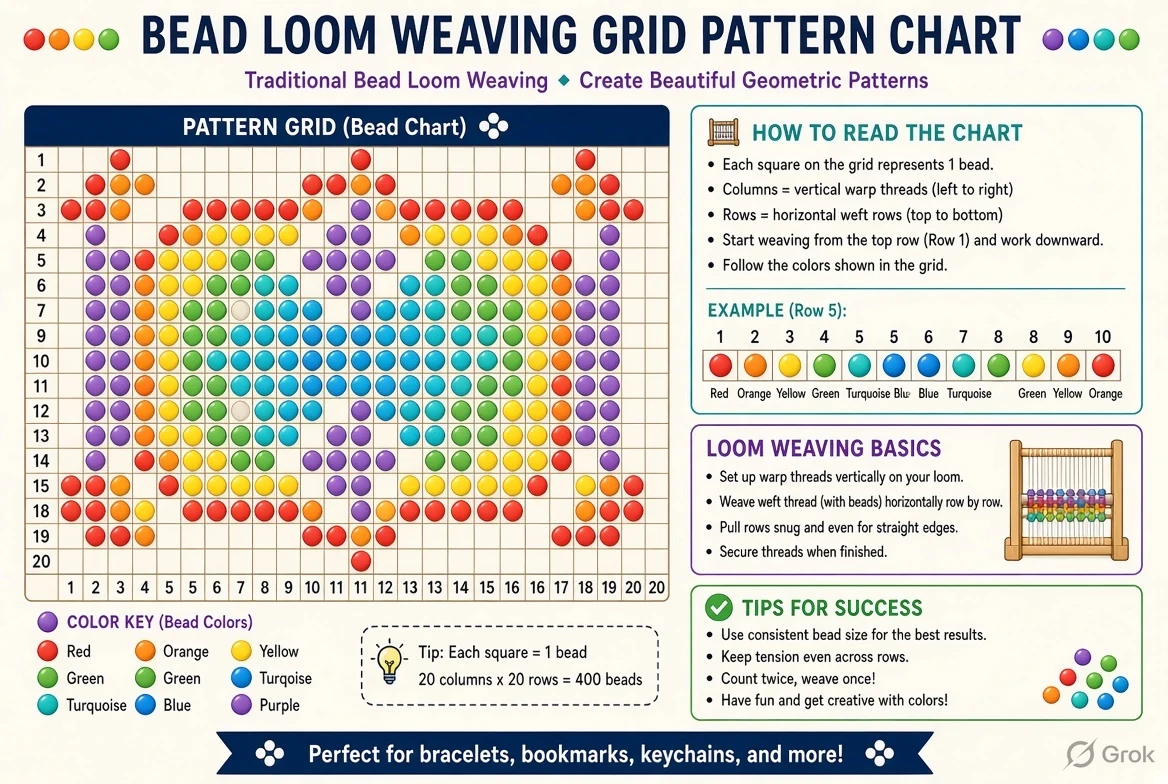
A loom pattern resembles square pixel art because each row lines up with the one above it. Beads may be cylindrical or rounded, so the physical appearance still depends on materials, but the chart columns remain aligned. Warp threads form channels around the beads, and the weft secures each new horizontal row. If a loom graph shows ten columns across, confirm the number of warp strings required for the specific loom and width; do not infer it only from a decorative border. The pattern should label the start row and color sequence. Finishing the many exposed warp ends is a separate practical step that beginners should plan before weaving.
How to start a first loom bead bracelet
Set up a compatible bead loom according to its manufacturer’s instructions and check that the warp threads are evenly tensioned. Choose uniform seed beads and a beading needle that passes through their holes. Put a stopper or secure the working thread as directed by the chosen method. Pick up the first color row, place it between the warp threads and pass the needle back through the beads while keeping it on the proper side of the warp strands. Gently seat the row rather than yanking it tight. Continue following the next row of the chart, checking the color sequence after every few passes. Leave enough material and time for the chosen end finish.
What is peyote stitch and why are its beads offset?
Peyote stitch builds rows from beads that sit in the spaces between those of an earlier row. Its profile resembles brickwork when seen in a flat finished piece, even though peyote and brick stitch have different construction routes. This staggered shape is why peyote pattern graph paper is not the same as ordinary graph paper for a bead loom. A diagonal motif may require different color placement after conversion. Peyote usually does not need a loom, which makes it convenient for narrow strips, tubes or shaped beadwork. The shape emerges from stitch placement, not from the name of the colors in the chart.
Even-count flat peyote: an easier introduction
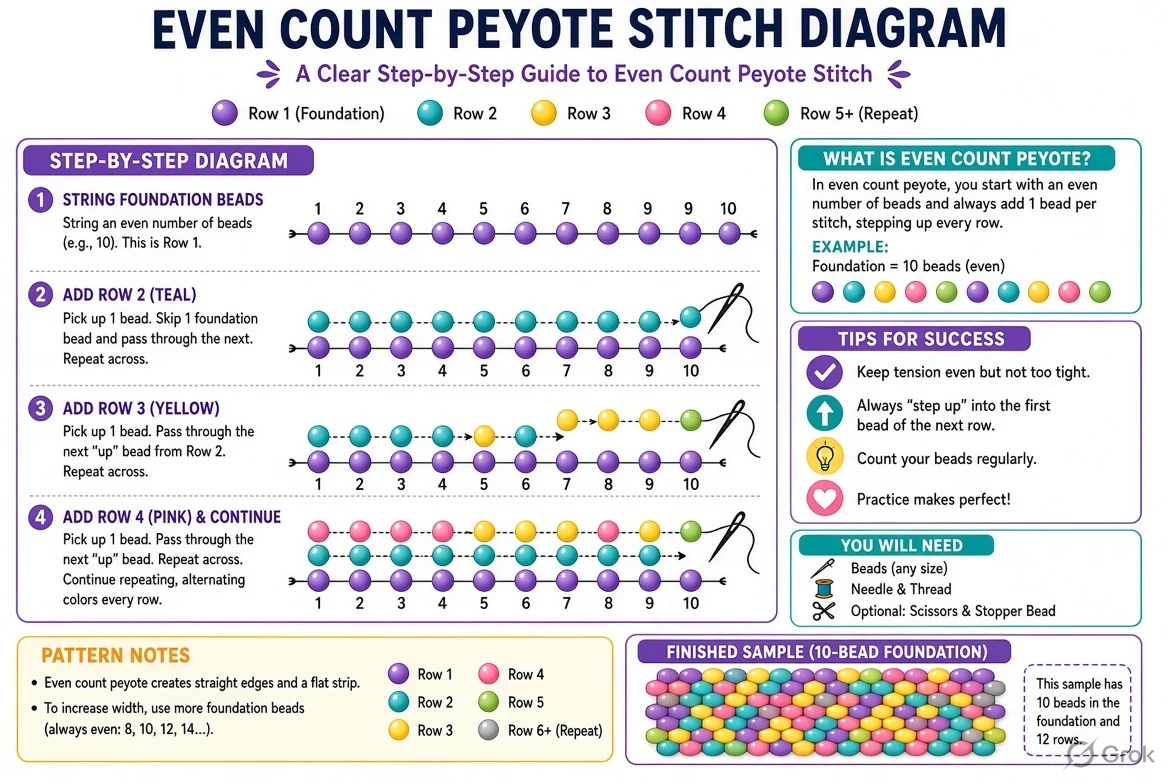
In even-count flat peyote, the working width has an even number of beads, allowing a relatively straightforward turn at each row end. Begin with the prescribed starting string of beads, often representing the first two interlocking rows, and use the working thread to pick up each new bead while passing through the raised bead positions. The needle then follows the chosen route back for the next row. The exact starting step depends on the tutorial, so compare the diagram rather than blindly counting the first string as a single conventional row. Even-count designs are usually a good introduction when a pattern does not require a central single bead column.
Odd-count peyote: the special end turn explained
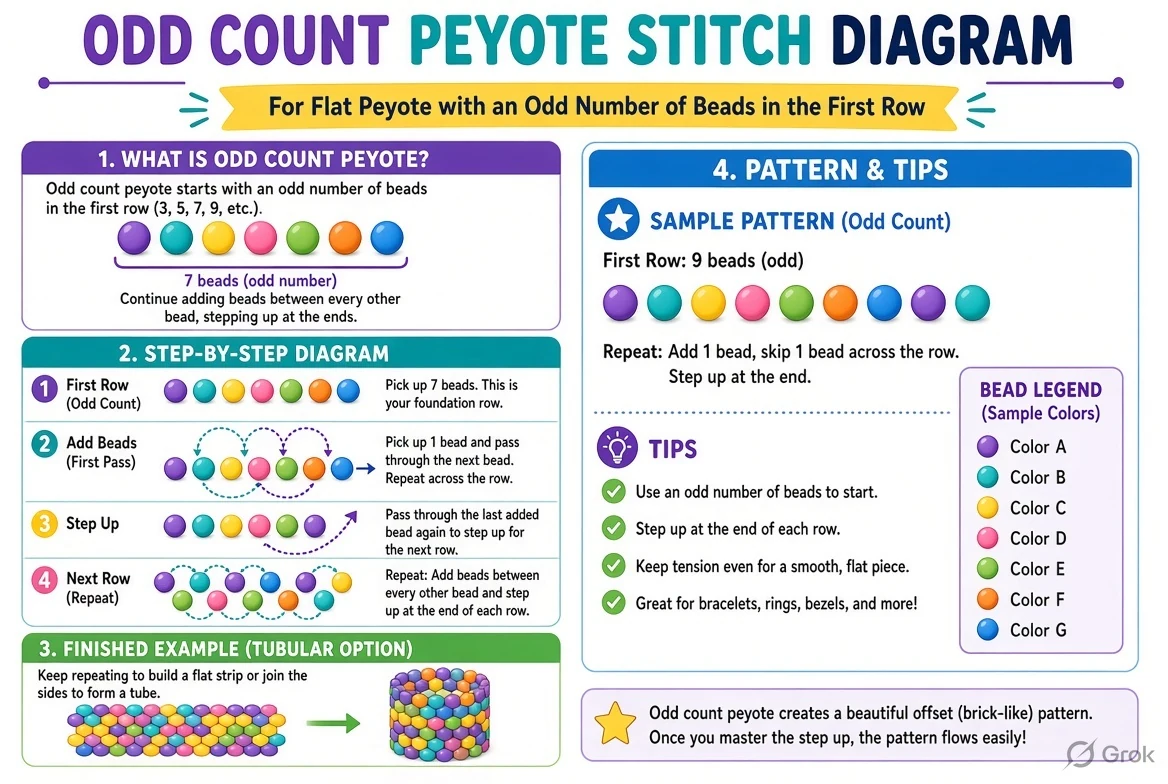
Odd-count flat peyote is useful when a design needs a clearly defined central column or symmetrical motif. Because of the odd working width, the return turn at one end is less straightforward than in even-count peyote. Techniques may use a special thread path through existing beads to reposition the needle. That extra step should appear in a proper diagram; it is not just an optional flourish. A beginner who works the wrong turn can end up with an uneven edge or a bead that sits outside the intended offset. Practice a small sample with obvious alternating colors before attempting a complicated centered bracelet.
How to recognize an incompatible graph before starting
A loom chart is generally a rectangular grid with beads aligned in straight columns. A peyote chart often uses offset rectangles or staggered ovals, mirroring the positions of raised and recessed beads. If a website labels the same image ‘loom/peyote pattern’ without providing separate versions, examine whether the bead colors still form the intended motif when staggered. Text and small hearts can shift noticeably. Before making a full bracelet, copy four or five rows to the correct stitch-specific graph paper and test them. A chart that looks plausible on a screen is not proof that the stitched result will be identical.
Converting loom grid art to peyote without losing the motif
Start by identifying the outer shape, background and important symmetry of the loom design. Move the colors to a peyote-format chart that preserves the desired visual motif as closely as possible, rather than assigning every square to the same coordinate number. Check alternating rows and both end edges. A design with a vertical straight stripe on a loom may look stepped on peyote, and a central star may need a different count width. Make a small physical swatch of the converted graph, especially when the piece will have lettering. Do not claim the conversion is automatic unless the tool actually outputs the correctly shifted rows and a matching stitch count.
Bead sizes, tension and finished texture
Evenly sized cylinder beads can create crisp detailed designs, while rounded seed beads may produce a softer appearance. Check the bead holes and use a suitable flexible beading thread and needle. Loom weaving involves tension from the warp and working thread; peyote has its own interlocked tension between neighboring beads. Pulling too tightly in either method can curl or distort a strip. Mixed bead sizes may make the chart grid irregular. For a bracelet, the feel against the wrist matters as much as the picture: check edges, closures and potential snagging. Do not use sharp unfinished wire ends or weak clasps on frequently worn beadwork.
End finishing: loom warp tails versus peyote thread tails
A loom project leaves warp threads that require careful finishing, which may involve weaving ends, binding or a designed clasp system. Peyote work usually does not have multiple loom warp strands but still needs securely woven-in working-thread tails. This practical difference can determine the method for a beginner who is making a small weekend project. Plan the clasp width and the exact final bracelet length before starting, because a bulky finish can alter the fit. Do not cut thread ends flush before securing them; repeated bending can loosen them. A picture of the finished front rarely reveals how the piece was properly reinforced on the reverse.
How to print or use these four diagram images
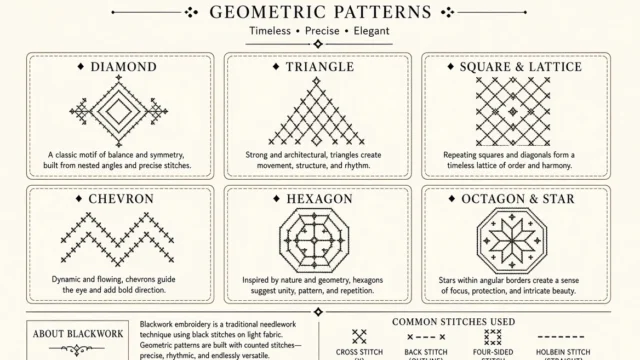
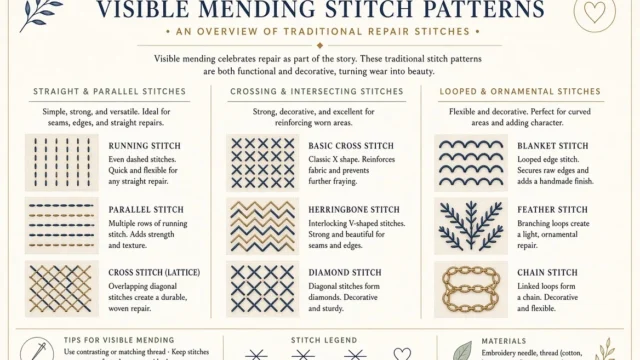
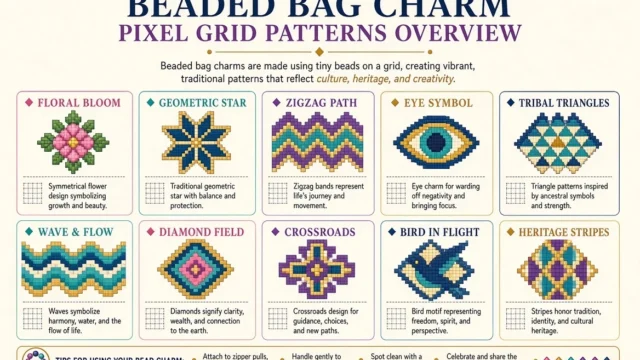
The page has a loom grid reference, two peyote stitch layouts and a side-by-side comparison. These are educational diagrams; the page does not claim a separate stitch-counted printable PDF file. If printing, use the browser preview to keep row labels and bead offsets legible. Count and number the chart if needed, and make a color key that does not rely only on subtle screen shades. For serious beadwork, choose official loom or peyote graph paper corresponding to the intended method and remake the motif before weaving. Treat these visual examples as teaching aids rather than verified instructions for a specific bead brand and size.
Common mistakes and next keyword ideas
Typical errors include putting peyote beads in straight loom-style columns, confusing odd-count with even-count turns, losing warp tension or cutting ends before making a secure finish. Another trap is assuming that a chart advertised as ‘seed bead bracelet pattern’ works for every stitch without conversion. Useful follow-up searches include ‘bead loom vs peyote stitch’, ‘peyote stitch even count diagram’, ‘odd count peyote turn’, ‘seed bead loom grid pattern’, ‘convert loom pattern to peyote’ and ‘bead bracelet graph paper printable’. These are intent-based search ideas, not invented popularity statistics. For the best result, match graph geometry to the actual method before buying materials.
Frequently asked questions
Is peyote stitch the same as bead loom weaving?
No. Peyote is usually off-loom and staggered; loom weaving uses warp threads and aligned rows.
Which is easier for a first bracelet?
A simple loom pattern or even-count peyote can both be suitable with their specific tutorials.
What is odd-count peyote?
Peyote with an odd working width and a less straightforward row-end turn.
Can I use a bead loom graph for peyote?
Not directly if the bead positions must remain precise; convert the design to the correct offset graph.
Why do peyote beads look staggered?
New beads sit in gaps among the prior beads, creating the offset arrangement.
Are the charts a finished free PDF pattern pack?
No. The four diagrams are comparison and technique references.
Sources and conclusion
Technical guides for bead structures: Fire Mountain Gems peyote guide and Artbeads seed-bead stitch guide. Related published guide: Crochet beginner patterns. Chart geometry must match the chosen bead-weaving technique, especially at row ends.






Share Your Opinion
Comments are closed on this post.