 Vista
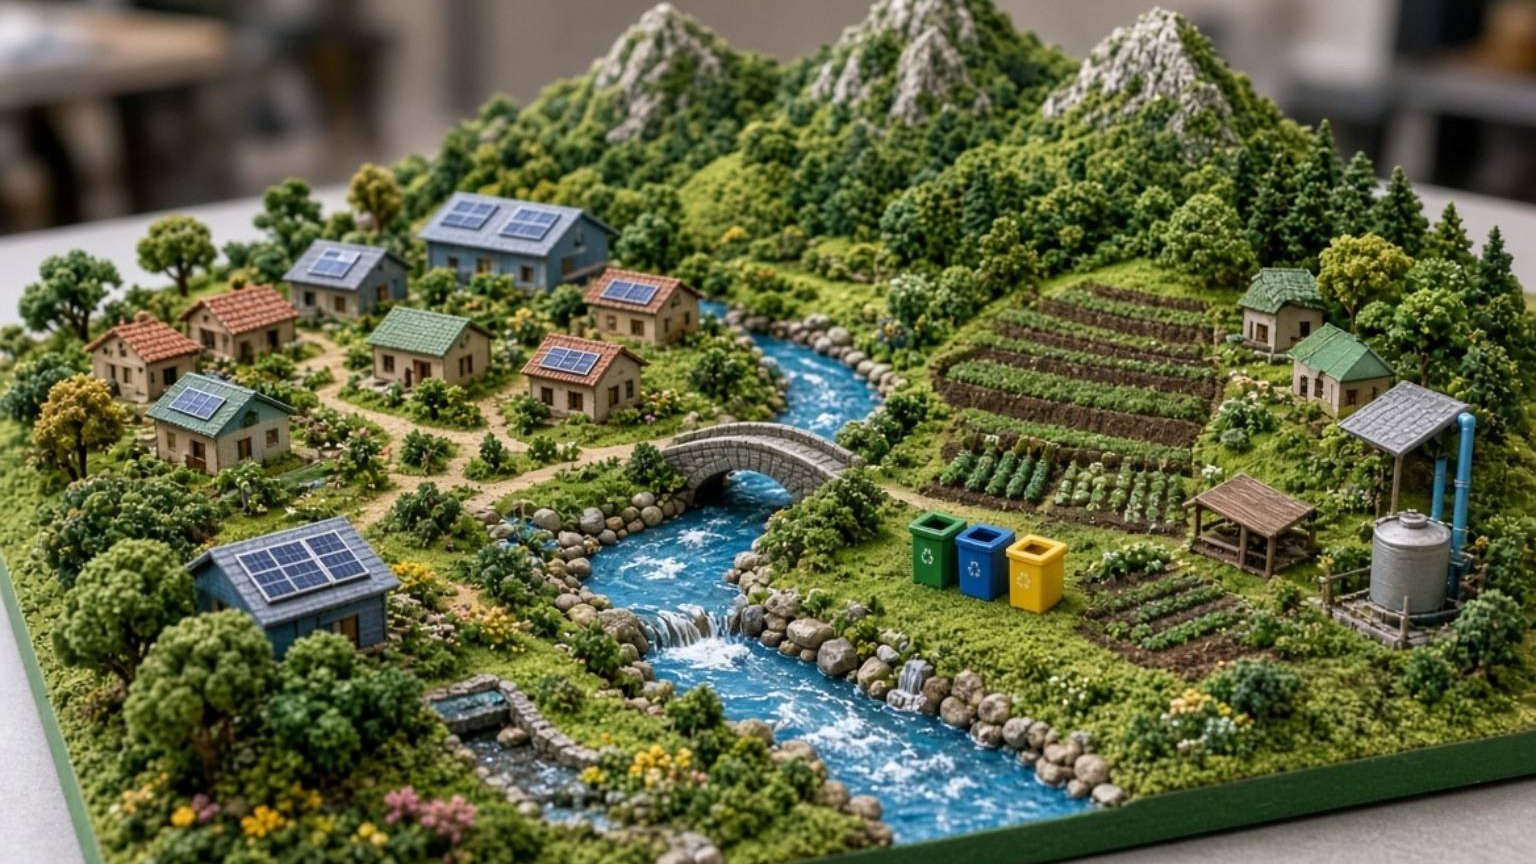
Need a water filtration working model for a school project? This illustrated guide brings together six diagrams: cartoon bottle-filter steps, a sand-and-gravel layer drawing, a technical blueprint, a multistage guide, a close-up of filter media, and a science exhibition poster. Students in approximately Classes 5–10 can use these resources to explain gravity, particle trapping and the difference between observation and proof. Important: A homemade school filter may improve how water looks but does not establish that it is safe to drink. Harmful microorganisms or dissolved contaminants may remain. This model demonstrates filtration; it is not a substitute for tested drinking-water treatment.
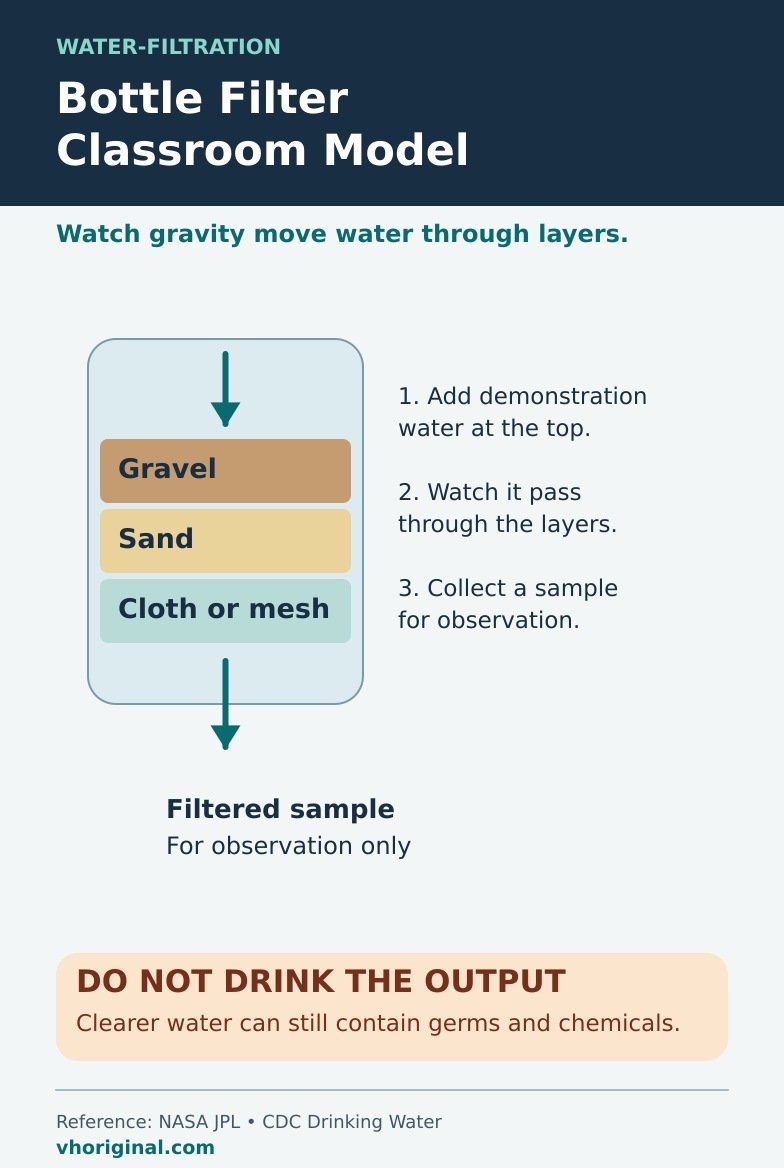
Picture 1: Easy Bottle Filter Cartoon Steps
The first poster gives younger students an overview of a container, filtering material and a collection vessel. Use a clean bottle with its edge prepared safely by an adult; cutting plastic can leave sharp edges. Avoid collecting water from drains or unknown contaminated sources. If a visual demonstration is needed, a small quantity of clean water containing safe soil particles is a better classroom example. Pour slowly and keep collected samples in clearly marked containers. Neither before nor after the experiment should anyone taste the sample. A simple illustrated sequence is often more useful for younger classes than a complicated filtration machine.
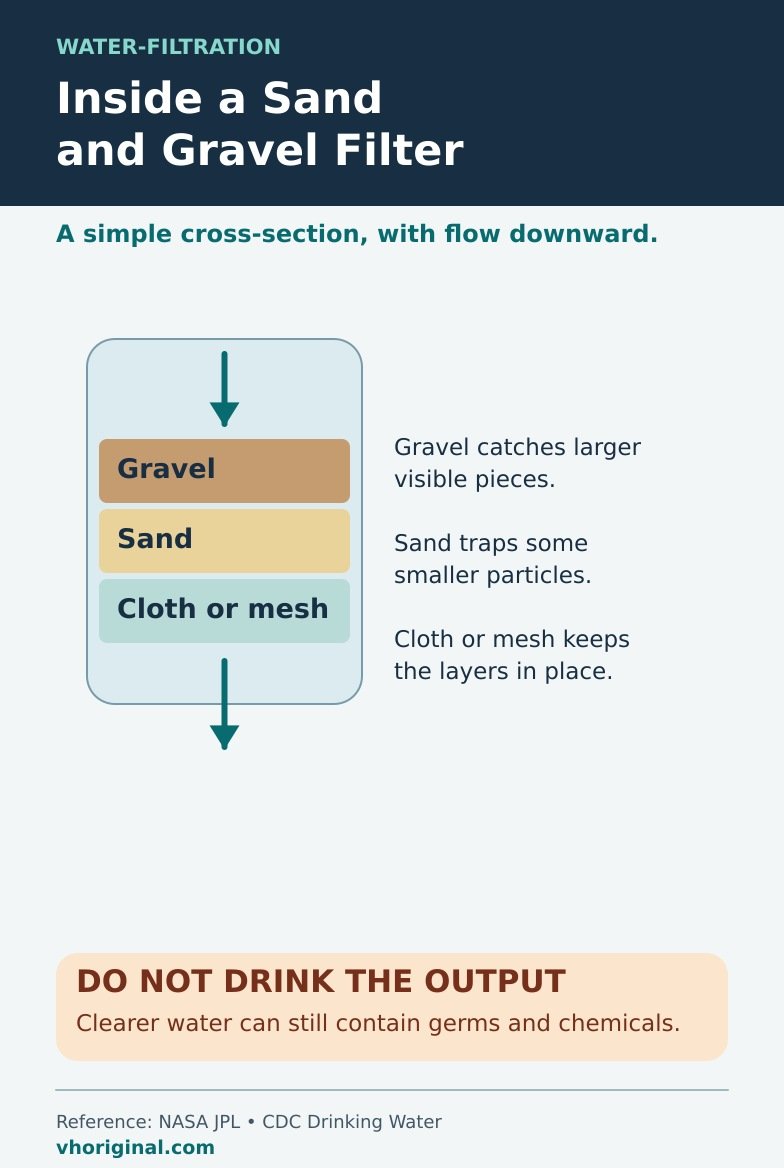
Picture 2: Sand and Gravel Layer Diagram
Sand and gravel have different particle sizes, which may affect what gets trapped and how quickly water moves. Coarse gravel and fine sand do not have identical roles. When reproducing the diagram, check the direction of water flow and verify where each material is actually placed. There is no single layer sequence suitable for every treatment system, and a generated picture may depict a configuration that is inconsistent with its arrows. Rinse demonstration materials appropriately so they do not introduce extra loose dirt. Label particle size, layer names and the outlet rather than inventing removal percentages. Children should be able to explain what they observed, not simply name each layer.
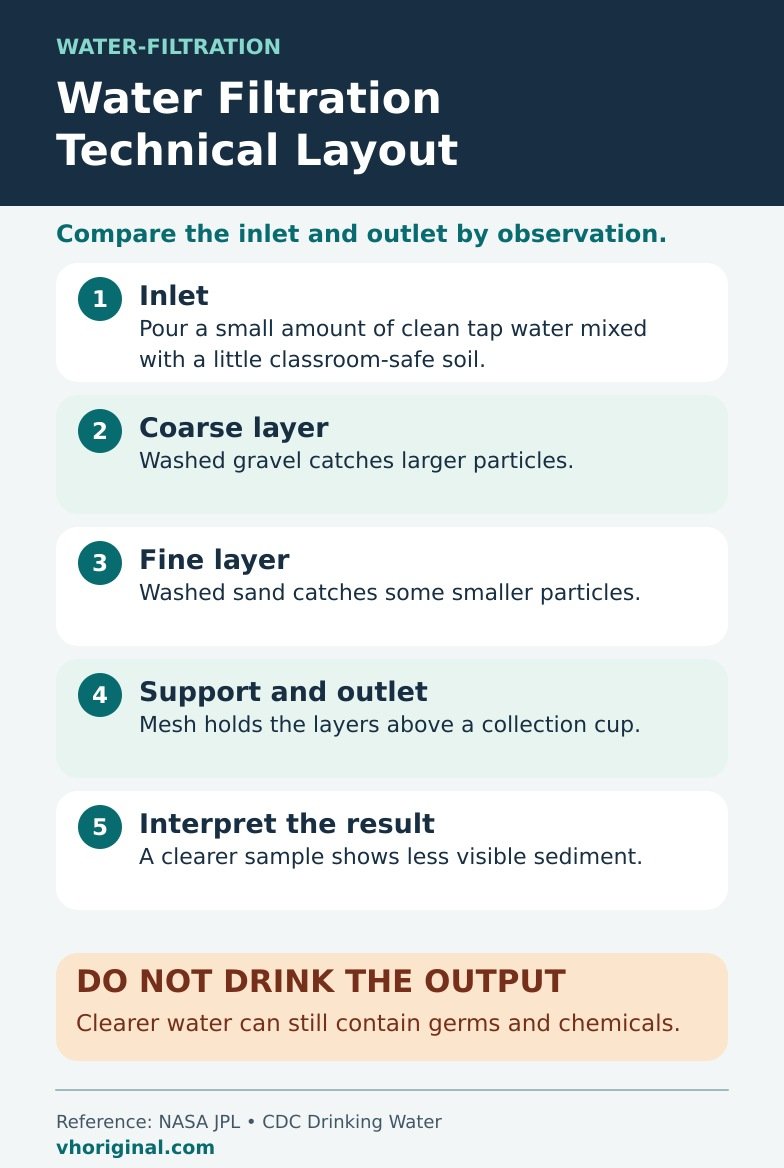
Picture 3: Technical Water Filtration Blueprint
A blueprint should show where water enters, which way it travels and where it is collected. If the model relies on gravity, the arrangement must allow water to descend; do not claim that a pump-driven model is purely gravity-based. Older students may compare how long a similar amount of water takes to pass through two safe filter arrangements. Record the actual time instead of making up a flow rate. Any arrows and outlets in an illustrated blueprint should be inspected carefully. Ask what would happen if the outlet were blocked or filter media were too tightly packed. These are useful engineering questions for a classroom demonstration.
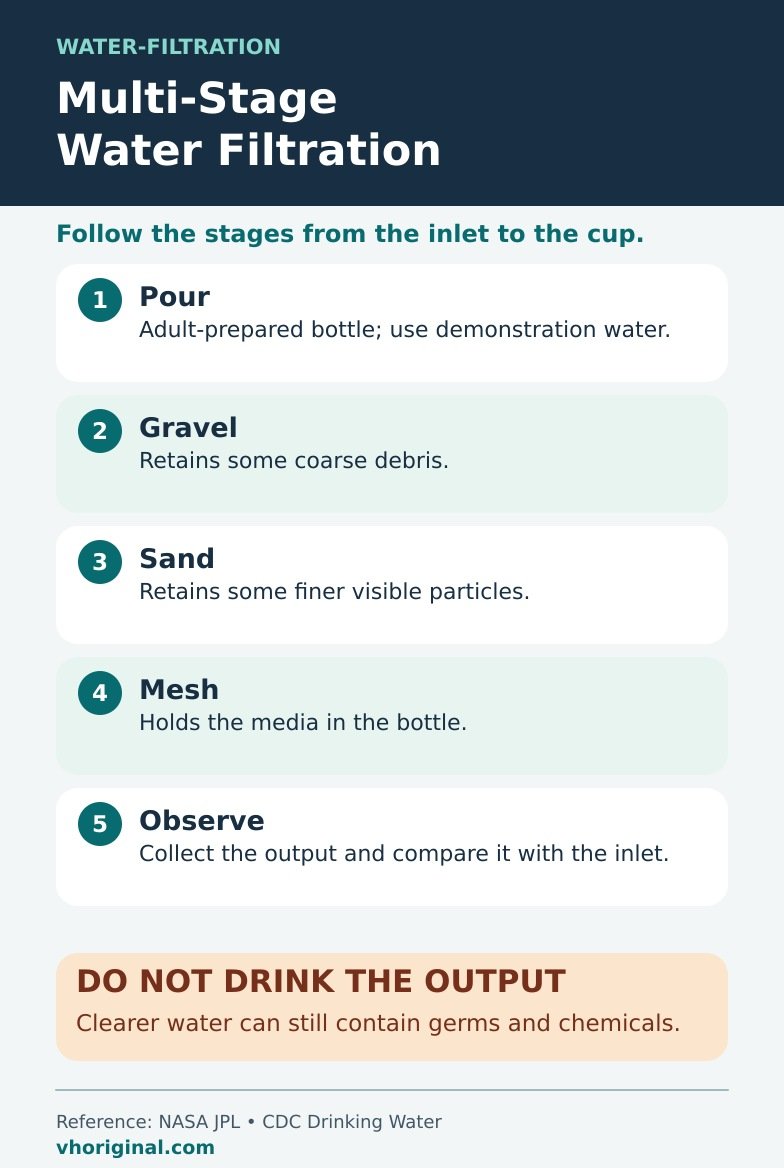
Picture 4: Multi-Stage Filtration Guide
A multistage school model uses two or more steps, each potentially contributing to the retention of certain particles. One stage may intercept larger material; another may be designed for smaller particles. However, adding stages does not guarantee removal of every microbe or dissolved pollutant. Real drinking-water systems may require appropriately designed disinfection or other treatment beyond simple filtering. Draw each stage separately and show the actual flow between them. Students should describe the purpose of each layer without implying a certified standard. If a poster includes a claim such as ‘100% pure’, remove it unless there is genuinely suitable laboratory evidence.
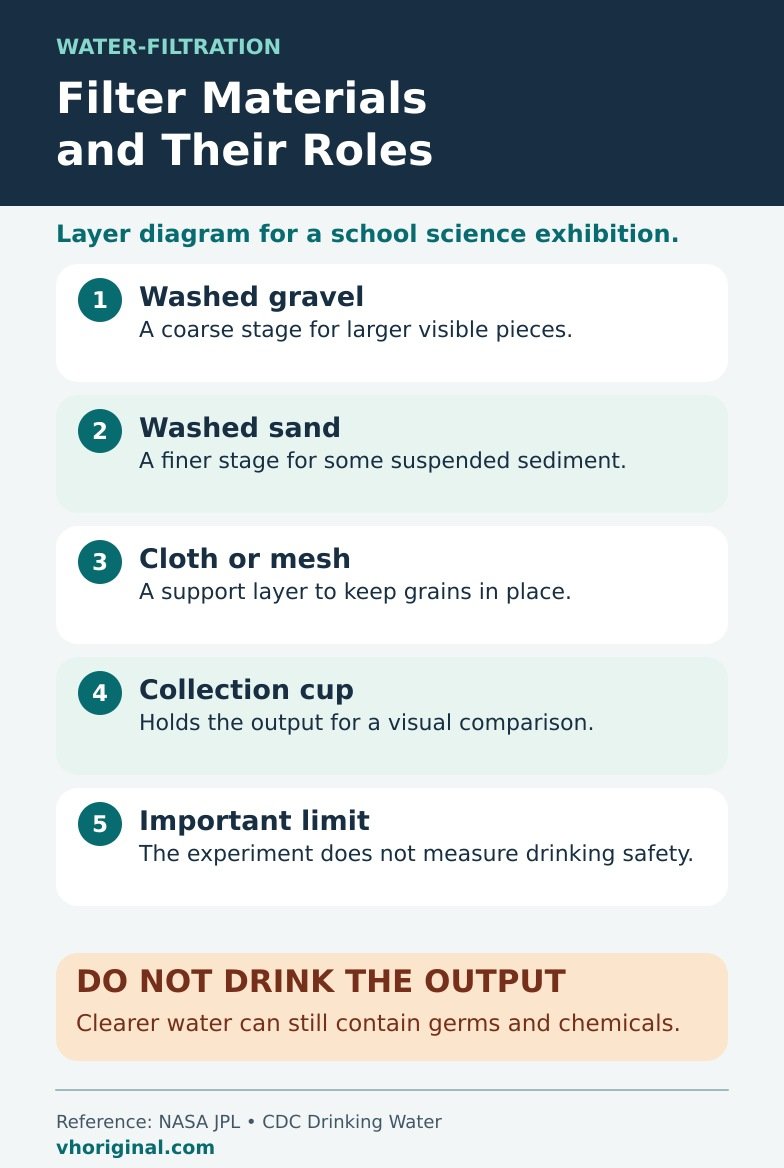
Picture 5: Filter Media and Layer Functions
This close-up illustration helps explain the material inside the filter: coarse particles, finer media, possible supporting fabric and a collection container. Match the labels to the actual demonstration. Filtering visible mud is not the same as eliminating colourless, dissolved contaminants. The CDC also emphasises that different water filters address different substances; appearance and smell do not prove drinking-water safety. Mark the collected sample ‘Not for Drinking’ in your project. Do not recommend building an actual household potable-water system from an untested classroom schematic. The proper lesson is the distinction between a physical model and a validated water treatment method.
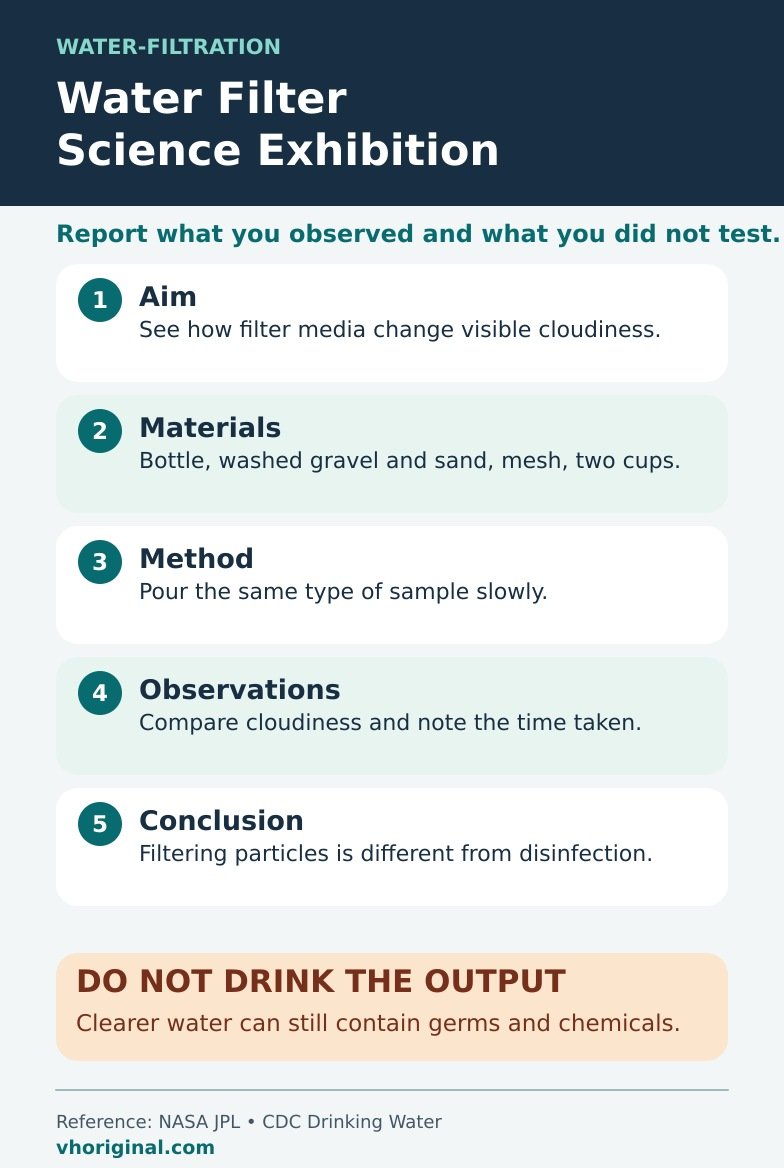
Picture 6: Science Exhibition Poster
The final visual can help structure a short exhibition speech. Show the materials on one side, the model in the centre and observations beneath it. If comparing cloudy and filtered samples, use clear, stable containers that students can see without touching the water. Record what was visibly different and what cannot be concluded. Do not state that all germs disappeared or that water is safe because it looks clearer. A strong presentation includes a limitation: ‘Our model illustrates some filtration effects; testing is needed to evaluate water safety.’ Students can then describe one practical improvement such as stabilising the layers or preventing spills.
Materials and step-by-step assembly
Gather a clean bottle, washed sand and gravel, fabric, stand and collection cup. Have an adult smooth any cut edges. Arrange the layers to match the intended water flow, pour a little safe demonstration water slowly and observe the result. Never drink the sample. Clean up afterwards and record only what was actually visible.
Frequently asked questions
Does a bottle-filter school model make drinking water?
No. It cannot demonstrate the removal of all harmful microorganisms or dissolved contaminants.
What materials are commonly used?
Clean containers, suitable sand and gravel, a support fabric and a collection cup.
Is there one correct filter-layer order?
No; designs differ, so arrows and media positions must match the actual setup.
Why include six diagrams?
They cover build steps, layers, blueprint, multiple stages and presentation needs.
Conclusion and sources
A water filtration school project is valuable when it explains particle removal, clearly reports observations and states what the model cannot prove about drinking-water safety.
Related science working models
Sources: NASA JPL — Water Filtration Challenge; CDC — About Choosing Water Filters.
Related project: rooftop rainwater harvesting model


Share Your Opinion
Comments are closed on this post.