 Vista
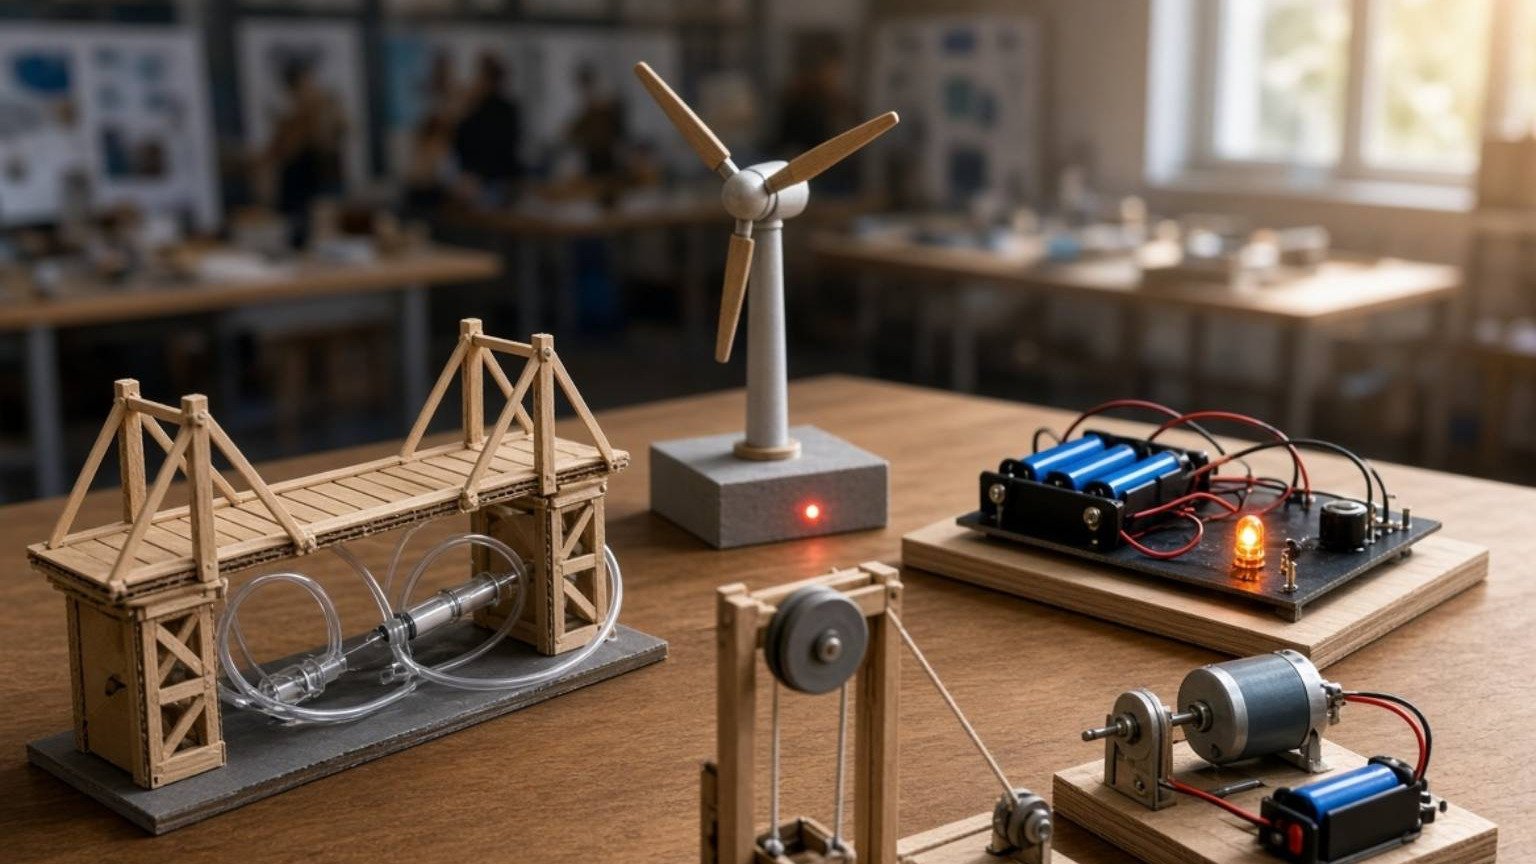
Need an arch bridge versus truss bridge school project with pictures? This guide pairs two educational posters: Arch Bridge Load Distribution and Truss Bridge Strength Comparison. Students in approximately Classes 6–11 can see how loads move through different structural arrangements and why a bridge’s strength depends on more than its silhouette. An arch commonly involves compression and supporting abutments. A truss connects straight members into triangles, with different members carrying tension or compression under particular loads. Both posters can be opened full-size for A4 drawing or cardboard construction. A simple school test does not certify a real bridge, and heavy loads have no place in a classroom demonstration.
How do arch and truss bridges differ?
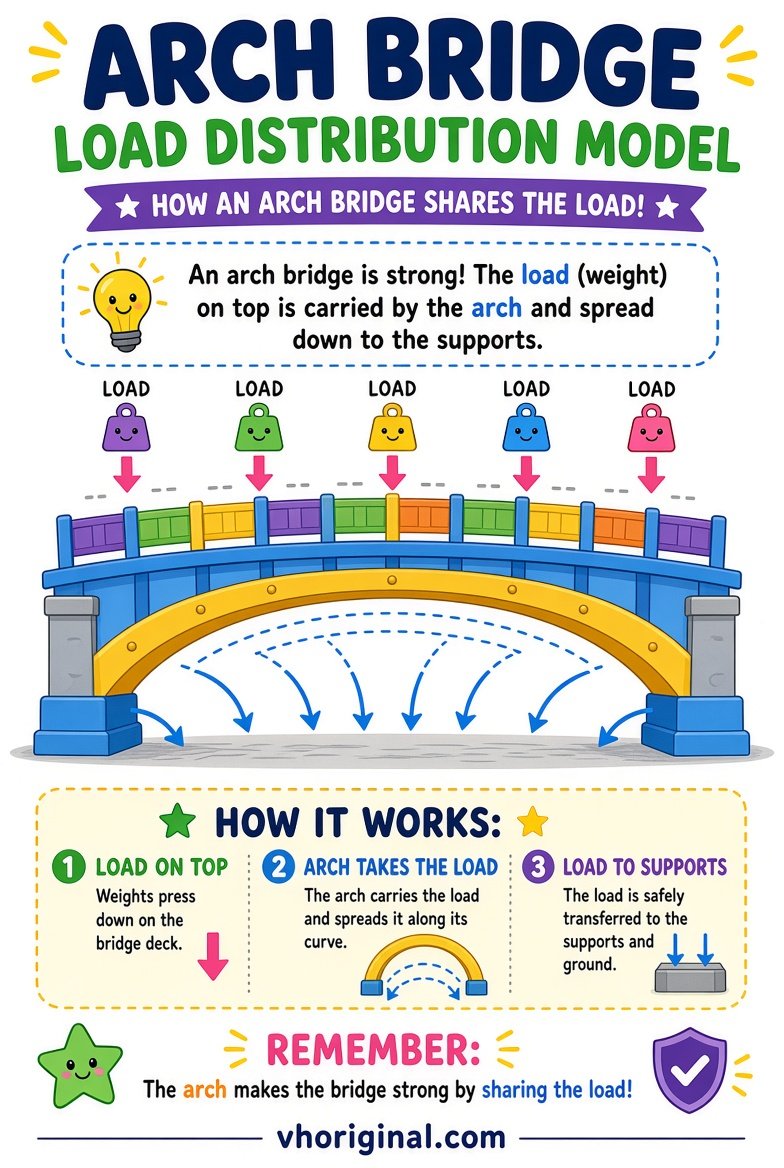
An arch carries applied loads through a curved structural path toward its supports. Compression is often important and the abutments may need to resist outward thrust. A truss is assembled from straight structural members, commonly arranged in triangles. Under an applied load, some members may be in tension while others are in compression. Neither type has one universal shape or capacity. Material, span, joint behaviour, support conditions and load position change the response. A school project should identify the deck, main members, supports and direction of forces before discussing which bridge works better in one specific test.
Picture 1: Arch Bridge Load Distribution
Identify the arch, deck, abutments and applied load in the first poster. The curved arch can transfer forces toward its supports, and those supports must resist the resulting reactions. A tiny paper arch resting on blocks gives a visual introduction to the concept, but it does not reproduce every property of stone or reinforced concrete bridges. Avoid drawing a force arrow that ends without any structural support. If the cardboard arch slips outwards, inspect the bases instead of forcing additional weight onto the centre. Label the compression idea carefully and let the student explain why stable supports are essential.
Picture 2: Truss Bridge Strength Comparison
Trusses rely on connected members and often triangular arrangements that resist changes in shape. Comparing two patterns requires attention to member lengths, joint stiffness, material and load placement. More triangles do not automatically mean an unlimited increase in strength. A light paper model can show a few repeated triangles with a deck between two supports. Explain the difference between tension, which pulls a member, and compression, which presses it. Do not label every member with the same force direction simply because a generated poster uses symmetrical colours. The precise forces depend on the loading and structural layout.
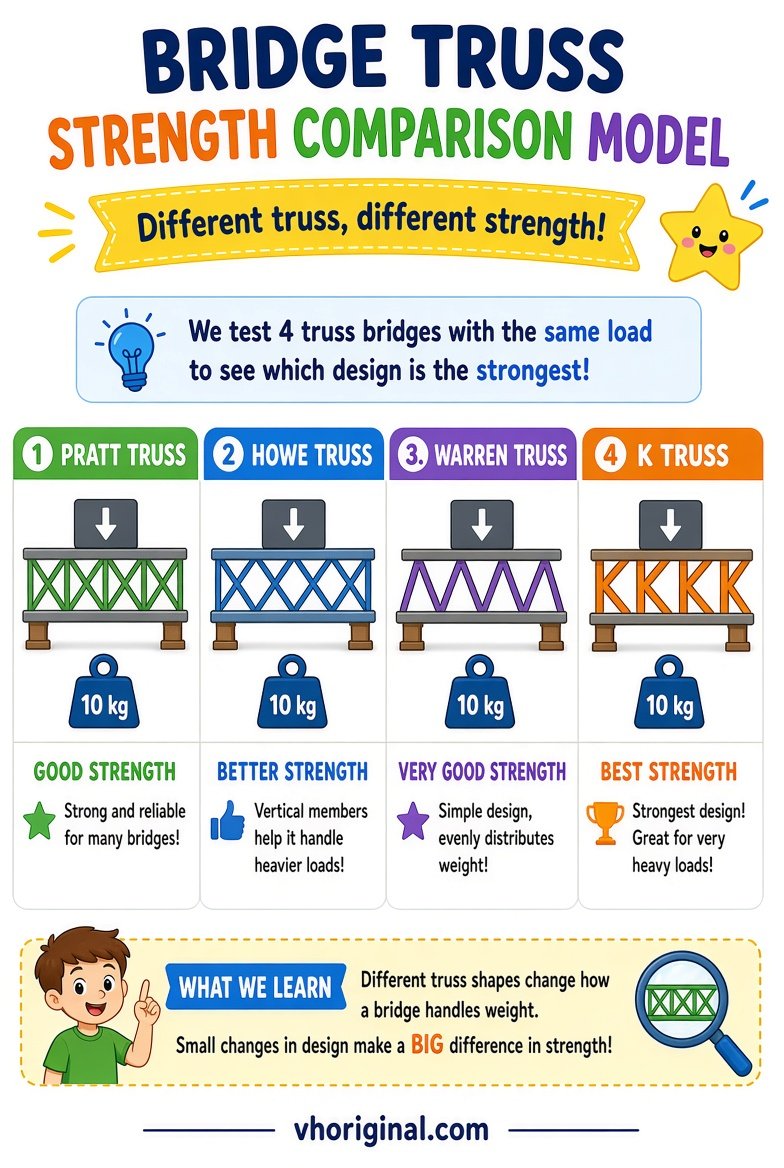
Chart note: The 10 kg labels and the strength rankings are illustrative, not test results. No truss is universally strongest. Use only small, lightweight loads with teacher supervision.
What does strength mean in a school model?
A school test may compare bending, joint movement and stability under a small load. Keep span, material and load placement similar for a fair comparison. Real bridge safety needs engineering standards and professional analysis; classroom results are not certified load capacities.
Build a simple cardboard arch bridge
Take a flat base, two stable support blocks and a light strip of flexible cardboard. Curve the strip into an arch and secure its ends so they cannot slide unexpectedly. Add a lightweight deck strip if it helps explain the drawing. Mark the support reactions and the arch in a side-view sketch. Heavy bricks, metal bars and concrete are unnecessary and unsafe for a small classroom model. Children should have help with cutting tools and keep fingers away from any snapping or sliding components. A clear arch with a correct diagram can teach more than a complicated but unsteady construction.
Step-by-step truss bridge construction
Use small craft sticks, paper strips, safe adhesive and a cardboard deck. Draw one triangular pattern to scale on the base first. Assemble two side panels with similar dimensions, then join them using lightweight cross pieces. Ensure the joints have dried before moving the bridge. Place it across supports of matching height. Add load and reaction arrows to a separate chart if the physical model is too small for labels. Check the joints rather than simply counting triangles. Do not attempt to build a bridge that a person can step onto; the intended loads are only small classroom objects.
Plan a fair and safe load comparison
Choose a small, harmless load such as paper blocks, and apply it gently in the same position on both models. Keep the support spacing consistent and record whether the deck bends, the joints spread or an arch end moves. Stop if the structure becomes unstable. Do not test with heavy weights near children’s hands or faces. An observation such as ‘Bridge A bent less during this test’ is meaningful only when the setup is described. One result does not prove that truss bridges always outperform arches, or vice versa. Real designs require engineering analysis and applicable standards.
School presentation and viva answers
A teacher may ask what compression and tension mean or why an arch needs secure abutments. Explain the difference using arrows from the posters. Another question is why triangles feature in truss designs; their geometry helps the structure resist changes in shape. Students should describe how the load is transferred to supports rather than memorising a claim that one bridge is ‘strongest’. Ask what could make a comparison unfair. The ability to name a limitation demonstrates better engineering understanding than a dramatic demonstration with a dangerous weight.
Image downloads and common mistakes
Open both full-size posters and verify support locations and force arrows. Avoid heavy construction materials or dangerous tests. If the teacher wants hand-drawn diagrams, use the pictures as references. A correct explanation of load paths matters more than decorative detail.
Frequently asked questions
Why is compression important in an arch?
It often carries much of the load toward the abutments in common arch designs.
Why are triangles used in trusses?
Their geometry helps connected members resist changes in shape.
Is one bridge type always stronger?
No. Materials, geometry, supports and loading determine performance.
Should students test heavy weights?
No. Use small, safe loads under supervision and stop if the model becomes unstable.
Conclusion and references
Arch and truss models teach structural load paths best when pupils can explain supports, tension, compression and limits of small-scale comparison.
Related school models: Science Working Models · Water Fountain Model
Sources: TeachEngineering — Bridge Types and Forces; TeachEngineering — Build a Bridge.
Related project: syringe hydraulic bridge model











Share Your Opinion
Comments are closed on this post.